Showing posts with label distress oxide inks. Show all posts

Sunday, December 5, 2021

Sassy 25 Days of Christmas - Day 5. Distress Oxide Inks.

Sassy 25 Days of Christmas - Distress Oxide Inks 2/$10. 


We offer over 15 colors of Distress Oxides!  Click here to see that Close To My Heart features.

________________________________________________________

To showcase the Distress Oxide Inks today, I created this layout using the Peacock Feathers Ink.  I am so delighted with how it turned out!


1.  Using the Peacock Distress Oxide and the Mini Ink Blending Tool, ink a piece of White Daisy cs with the Blending Tool in a circular motion/pattern.  Cover 2 pieces of White Daisy cs.  Note: Using the All Purpose Mat underneath your cardstock allows you to successfully ink the edges as well.


2.  Load the overlay from CTMH's new cartridge "Love Each Day" into Design Space.  

3.  Unlock the "lock" and change the image size to 11.5" x 11.5".  Cut the overlay twice out of White Daisy cs.

4.    Center, and adhere, the overlay to the inked cardstock.  (Look at how the circle pattern underneath brings texture to the artwork!)


5.  Cut desired title.  Ink title with the Blending Tool and ink.


6.  Adhere pieces, mats and titles as desired.

Supplies used:  (Z3866) Mini Ink Blending Tool, (Z3833) Peacock Feathers Distress Oxide Ink, (Z3293) Clear Shimmer Brush,  (1385) White Daisy cs, (Z2060) Thin Foam Tape, (Z1836) Non-Stick Micro Tip Scissors, (Z3372) Adhesive Runner, (Z3235) 4" Flip Flaps.

Back by request, welcome to the Sassy 25 Days of Christmas!  Each day, from now until Christmas, I will be sharing a special of some sort.  Some might be product, other might be class kits, but either way, this is a great way to celebrate your love of scrapbooking and paper crafting all December long!  

The days specials will be posted each day around 3PM and will be only good until 2:59PM on the following day.  There is be a special link in my www.inallsassiness.com shop for that days special.  The special price is the final price - there is nothing additional for tax.  Visit here on my blog, or my shop each day to check out the special and order the ones that you like!  The shipping will be set to pick up so that shipping charges are not assessed.

During the week between Christmas and New Years, I will be sending out all orders from the collective 25 days.  If shipping is needed, you will then be sent an invoice for the actual shipping to you (for most customers this is right around $10 per box) although depending on the weight, it might be a little more.  Once you pay the invoice on a secure site, your box of all your happiness will be mailed to you.

Anyone who takes advantage of 5 of the 25 days will receive a special gift in their box.

Additionally, all VIP's that take of advantage of 5 of the 25 days will receive a free pack of the Smitten Paper with Sticker sheet with their box!  VIP's will also receive VIP Credit for the purchase price of their special orders all month.

Until tomorrow,

Sassyfully yours,

Tonya

Saturday, January 23, 2021

SJLS #13 Oh, Blossoms of Sunshine Layout

 Sassy January Layout Series #13

Welcome to the 13th segment in a series of 31 that will be shared during the month of January. Click here to find out more about the Sassy January Layout Series.

Today's layout was also designed by Close To My Heart's art department for the January Album retreat.  I changed the colors a little to work with my photos.  CTMH used more orange tones, which I converted to pinks and then made a few more tweaks along the way.  

Creating this layout truly extended my uses of the Distress Oxide inks.  I loved learning, and then teaching, how to create the stitched sunbeams and then taking it a step farther and creating the patterned circles for the right page with the stencils.  So many possibilities!


CTMH introduced a special stamp set just for the album retreat and as of Monday, it is now available for anyone to purchase.  It is a fantastic stamp that I know I will use over and over. (D2008) Count My Blessings.


For this circle, I used the light side of Canary cs, and the Mustard Seed Distress Oxide ink.


For this circle, I used White Daisy cs, and Peeled Paint Distress Oxide Ink.
Also note how the stitched grid blends the colors - this is done by inking one color over or with another colors.  It creates a really unique color blending.


For this circle, I used the light side of the Flamingo cs and the Pickled Raspberry Distress Oxide Ink.
For this one, I wanted to point out the stamped stitching that was created with the stamp set and Black ink,

Here you can see the splattering that was done with the Distress Oxide inks and the waterbrushes.


The sunburst was created with the long stitched border from the stamp set.  It was done in alternating colors, in first, second and third generation stamping and then also with blending.  I shared a how-to-video in my In All Sassiness Scrapbooking Facebook group if you would like to learn how to create this effect.


After the sunbeams were stamped, I used those, and the perimeter line to stamp the title along the curvature and adhered the pink acrylic shapes in between each word.


Supplies Used:  (D1966) Simple Serif Uppercase, (D2008) Count My Blessings, (Z2805) Black Exclusive Ink Pad, (Z3827) Picked Raspberry Distress Oxide Ink, (Z3831) Peeled Paint Distress Oxide Ink, (Z3830) Mustard Seed Distress Oxide Ink,  (Z3833) Stencil Set #2, (X9023) Jan-Feb Mix Ins, (1385) White Daisy cs, (X6050) Flamingo cs, (X5982) Canary cs, (X7264S) Happiness Lives Here Sticker Sheet (from paper pack set), (Z3850) Pink Acrylic Hearts, (Z3224) Waterbrush.

--------------------------------------------------------------


For the class kit version of this layout, the circles are all pre-cut and stamped for you, and the the patterned circles are all pre-down for you.  The patterned papers are included as well as the bases and a full sheet of Flamingo for the mat on the left side.  A full package of Pink Acrylic Hearts is included and bulk stickers for the word sunshine.  Included will be the link to how to create the Sunbean pattern.  For this, you can use a stitched border that you already have, or you can add on the featured stamp set , Count My Blessings, for $17.  The title can be stamped with any alphabet stamp set.  I used (D1966) Simple Serif Uppercase.

Today's partnering product special is on the Stencil Sets.  There are three different sets, each including three stencil.  You can buy one set, two sets or all three sets for a special price of $12.  Set #2 is the set that I used in this layout.  I love the possibilities with the various patterns.  This product special is valid until 9:59am on 1/24/21.


You can purchase both the featured layout, or partnering product special in my shop at: www.inallsassiness.com.

Sassfully yours,
Tonya


Saturday, October 31, 2020

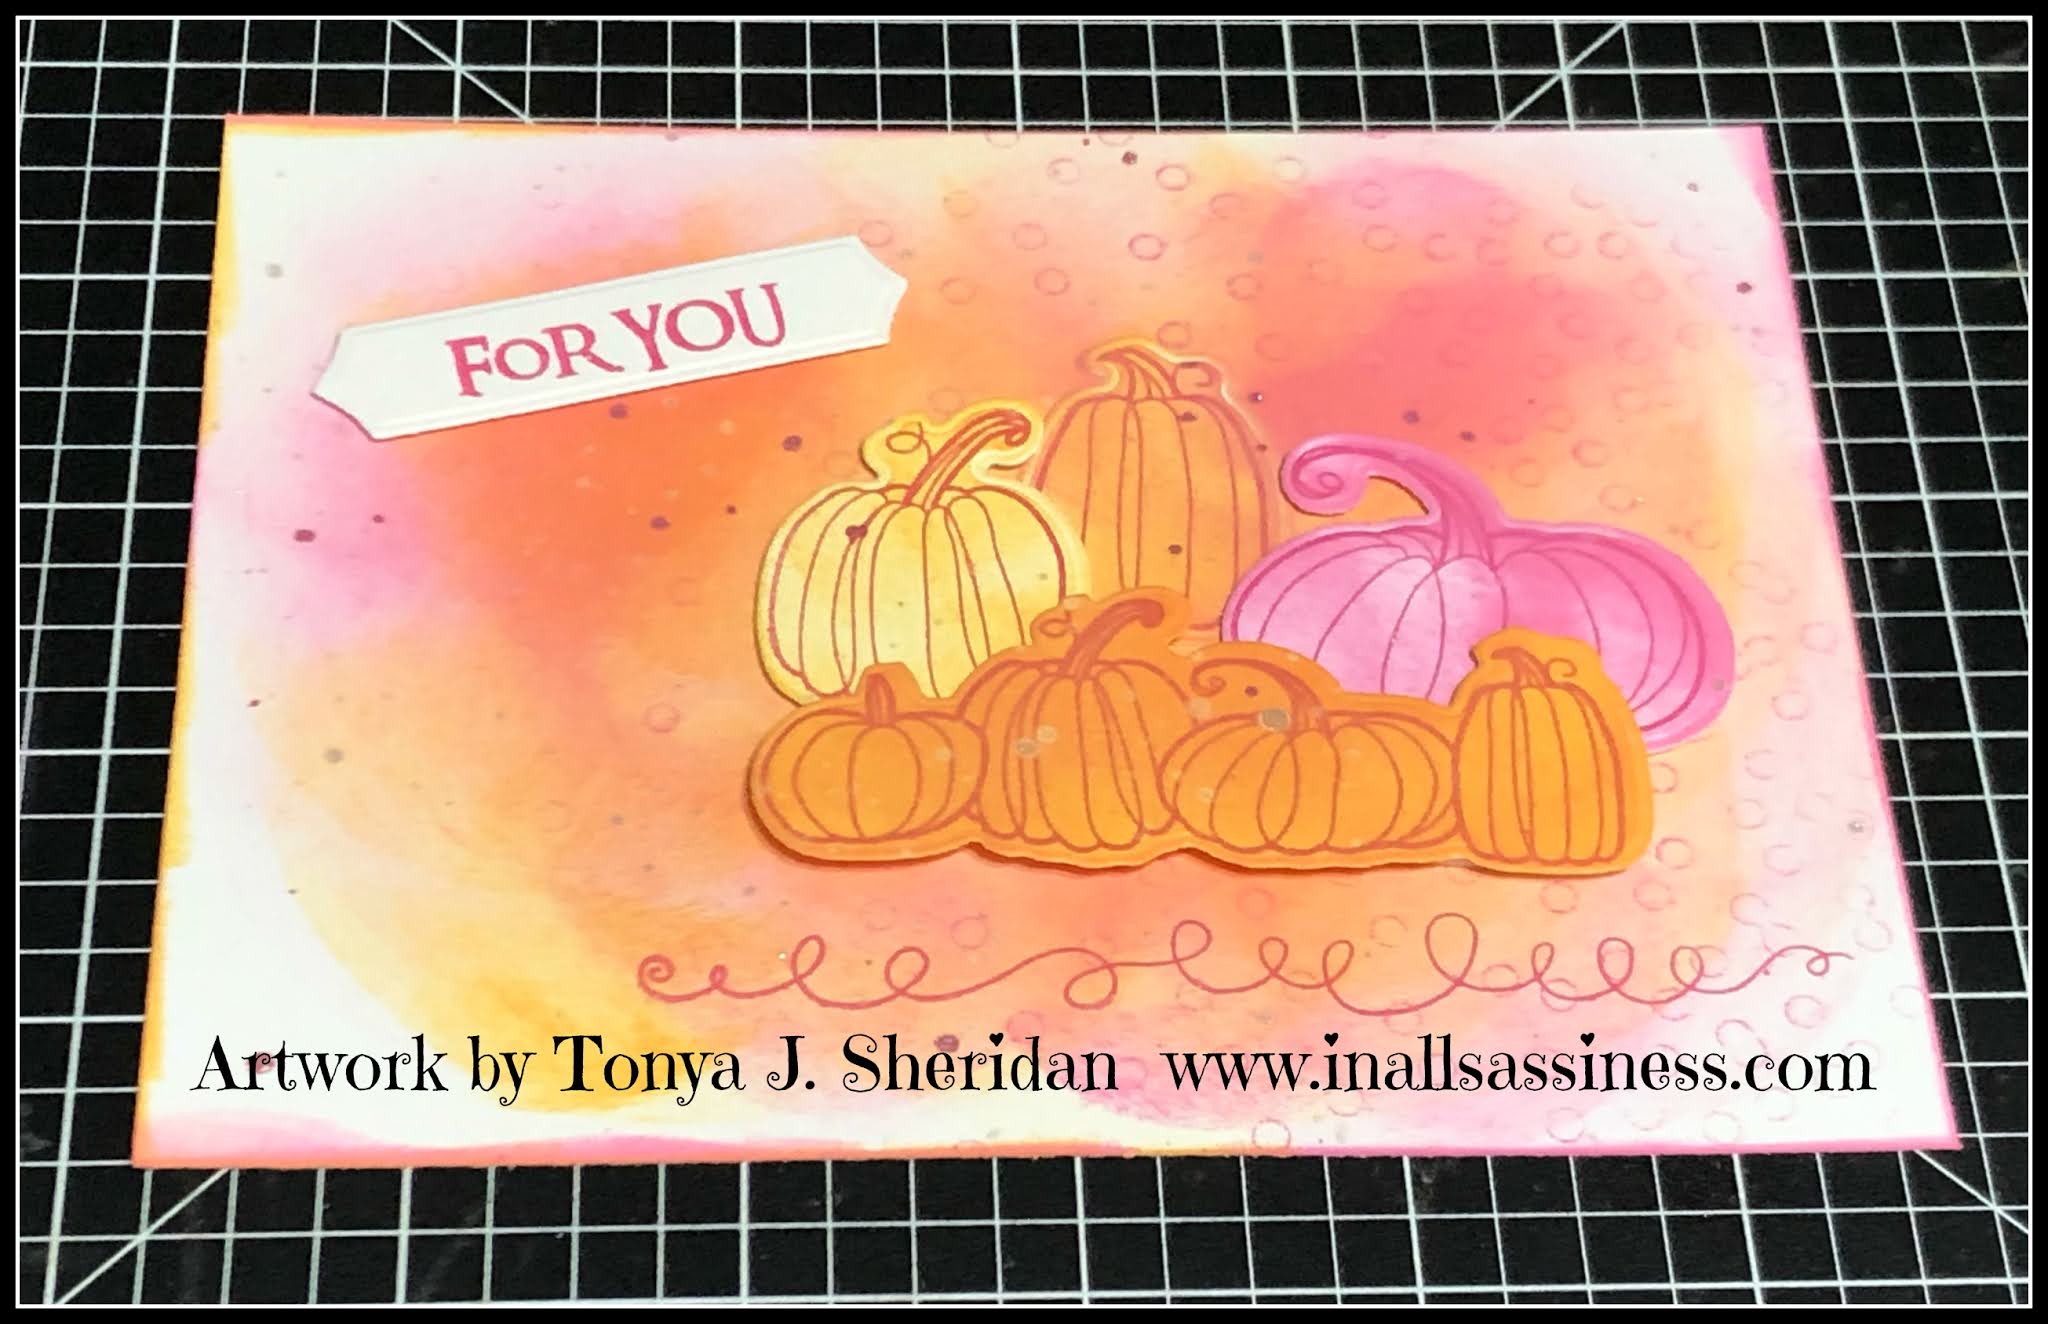
Distress Oxide Inks meet pumpkins!

Happy Halloween!!  While Halloween looks very different this year, I still love my pumpkins and everything about them so for a technique demo in my Pumpkin Crop today, I taught this adorable (in my opinion) pumpkin card!  I am so happy with how it turned out!  I recorded a live video of the step by step process that can be viewed at anytime in my In All Sassiness Scrapbooking Facebook Group.  If you would like to join this group to view this video, as well as other how to videos, challenges, tips, and just a great group of scrapbookers and paper crafters, you can request to join by clicking here.  


So let's chat on how to create this card!


Begin with colors of choice.  I used the Spiced Marmalade and the Picked Raspberry.


Apply Spiced Marmalade ink to base in a circular motion.


Add Picked Raspberry ink on top of the Marmalade ink in a circular motion.


Add Picked Raspberry to the raised side of Embossing Folder of choice.


Place paper inside embossing folder.  Close and rub the top of the folder to 
transfer ink design.


Ink edges that were not inked when adding ink & stamp doodling line
in the lower right corner of the paper.


Use the Thin Cuts and cut the pumpkins out of White Daisy cs.
Use the Distress Oxide inks to color as shown above.


Stamp pumpkin images onto inked pumpkins with 
(CTMH) Raspberry Exclusive Ink.


Splatter the Clear and Raspberry Shimmer Brushes over the entire 
card including the pumpkins.


Add sentiment and card is complete.

 Supplies used:  (Z3293) Clear Shimmer Brush, (Z3606) Raspberry Shimmer Brush, (Z2812) Raspberry Exclusive Ink Pad, (Z3827) Picked Raspberry Distress Oxide Ink, (Z3829) Spiced Marmalade Distress Oxide Ink, (1385) White Daisy cs, (Z3532) Autumn Blessings Stamp Set and Thin Cuts, (retired) Say It In Style Stamp set & Embossing Folder.  These items may be purchased on my CTMH website at: www.tonyasheridan.ctmh.com.

Have a great day and whatever you do, make it sassy!