Showing posts with label Shaker Elements. Show all posts

Thursday, June 1, 2023

Irish Blessings!

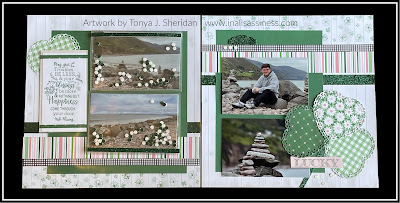
The Lucky to Know You is a a fun, and charming stamp set that has the most beautiful of Irish Blessings as one of the stamps.  As soon as I saw this stamp set, I knew I wanted to create something special with it.  With that being said, this technique packed layout evolved!  I designed this for my signature Shamrock Crop that took place in March.  Participants were able to create each technique through the course of the weekend and then put everything they learned all together to create this layout.

Here is the layout complete with photos.  You might note that I opted not to journal on this layout - that is true.  This is the second layout in a set of two layouts of the same event and the journaling is on the other layout.  For those creating this layout, you could add journaling inside one of the flip flaps if desired.

(Note: to see the pictures better, click on the image and it will open larger in a new window.)


This is the layout with both sets of flip flaps, and the flip flap shaker elements closed.


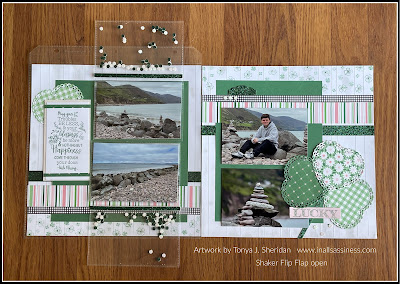
For this next picture, the shaker flip flaps are open, and the 2nd set of flip flaps are closed.


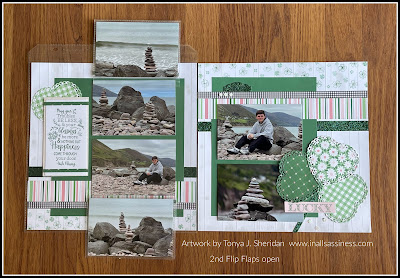
This photo shows the middle flip flaps open.


Here are photos of the layout, and the artistic details of the layout without my photos.


Details of hearts/shamrock - these were cut with a retired thin cut and then layered together to create a shamrock.  The stem is created with both Evergreen Glitter paper & Evergreen cs to give it more depth.


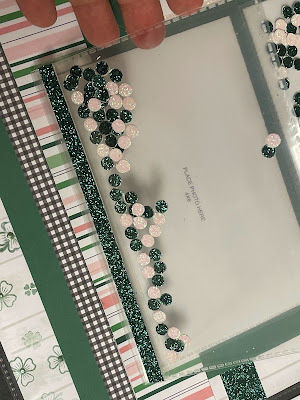
Details of flip flap shaker:  the flip flaps are stacked two high.  Both of the top flip flaps have been converted to shaker elements. They are sealed and include glitter circles inside.  How fun is this right? When the flip flap overlaps a photo it creates a fun look.  By stacking the flip flaps, it provides the opportunity to include additional photos.  


The bases were created by scoring and inking White Daisy cs then inking them with the Linen Ink pad and finally random stamping with 2nd and 3rd generation stamping.  Collectively, the result is amazing!  I created a You Tube Video demonstrating how to create the background paper.  Click here to watch the video.

Here are the details of the stamp set that I used:


Supplies used:  (C1967) Lucky To Know You Stamp Set, (Z3983) Tags & Tabs Thin Cuts, (Z3794) Sage Liquid Pearls, (1385) White Daisy cs, (X6036) Ballerina cs,  (Z3843) Ballerina Glitter Paper, (CC2231) Daisy, Daisy Paper pack with stickers, (X6030) Evergreen cs, (Z6512) Evergreen Exclusive Ink Pad, (retired) Evergreen Glitter paper, (Z2824) Linen Exclusive Ink Pad, (Z2060) Thin 3-d Foam tape, (Z3341) Thin 3-d Foam Dots, (Z3372) Adhesive Runner, (Z341) Mini Glue Dots, (Z3340) Dual Tip Permanent Glue Pen, (Z679). Current supplies may be ordered on my website at: www.tonyasheridan.ctmh.com.  Additional supplies needed:  Red Line Tape, 12” Scoring Board & Bone Folder - if scoring your own paper, hand held hole punch.  The current supplies can be ordered on my Close To My Heart website at: www.tonyasheridan.ctmh.com.

Because I loved the end result of the layout so much, I decided to make a few extra of the class kits to have available in my shop.  You can order this layout by clicking here.

Sassfully yours,

Tonya
Sunday, September 4, 2022

Celebrating You "Celebrate" Layout

 This layout was originally designed by Close To My Heart, however I had to add a few of my personal tweaks.  The layout is created with the Celebrating You paper collection which is a new addition to our 2022-2023 Core Idea Book. I love how the squares are patterns that all coordinate and the solid divided squares that are created with the new Square Patterns Thin Cuts.  Such flair right?


To see a larger photo, click on the photo above and it will open in a new window.

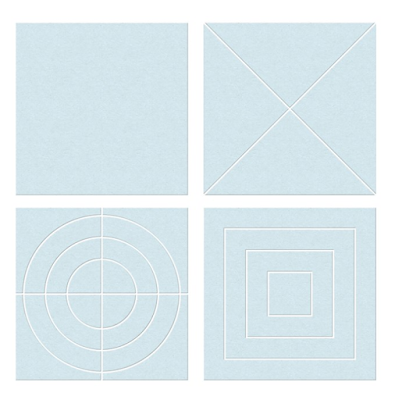
This is the new (Z4619) Square Patterns Thin cuts which was used for the solid divided squares.  Oh the possibilities right?  
And here are a few more detail photos:

On the left page, there are two stacked 4" x 4" Flip Flaps.  The lower one allows for additional photos and the top one is adhered shut to create a shaker Flip Flap!  It adds a little pizazz to the layout.


The title is Cricut Cut and included in my kit version, but of course you could use your own title if this one doesn't suit your needs, or your photos.


And here is a close up of one of the divided squares.

This pre-cut kit is available in my shop by clicking here.

Supplies used:  (X8032B) Celebrating You Paper Pack, (X5978) Glacier cs, (X6066) Honey Butter cs, (X6046) French Vanilla cs, (X5957) Sapphire cs, (X5968) Lagoon cs, (Z2900) Silver Star Confetti, (Z3235) 4" Flip Flaps, (Z4619) Square Patterns Thin Cuts, (Z2060) Thin Foam Tape, (Z3372) Adhesive Runner, (X5024) Red Line Tape.

Sassfully yours,
Tonya

Monday, May 16, 2022

Black & White Flower Elegance


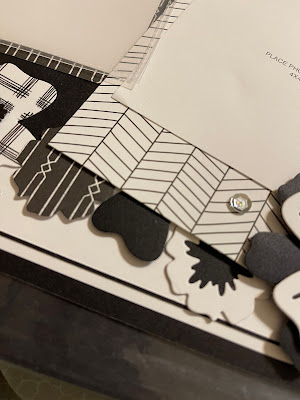
This layout was created for the Chantilly expo and features the Layered Flowers Thin Cut sets and lots of helpful hands to cut out all of those flowers x 400 sets!  The work, and woman-power aside, the layout turned out absolutely stunning!  I love it!!!  And this Thin Cut set made the layout absolutely beautiful.  The set has so many possibilities to mix and match the flowers and centers.


It is also noteworthy to point out the numerous shaker elements on the layout which add that extra special touch.


This class kit is available in my shop with all of the pieces pre-cut for you!  You can check it out, by clicking here.

 Supplies used:  (X9036) Mix-In Paper Pack, (Z4324) Layered Flowered Thin Cuts, X6047) Black cs, (1385) White Daisy cs, (Z4304) Silver Loose Sequins, (Z4310) Circle Shaker Windows Foam & Windows,  (Z4309) Circle Shaker Window Thin Cuts, (Z3293) Clear Shimmer Brush, (Z3563) Diamond Clear Stickles, (Z3234) 3” Flip Flaps, (Z4220) Anti-Static Pouch, (Z4325) Pick-Up Tool, (Z2060) Thin 3-d Foam tape, (Z3341) Thin 3-d Foam Dots, ((Z3372) Adhesive Runner, (Z341) Mini Glue Dots, (Z3340) Dual Tip Permanent Glue Pen, Current supplies may be ordered on my website at: www.tonyasheridan.ctmh.com.  

Sassfully yours,
Tonya

Friday, June 25, 2021

Mickey Shaker Layout

 Introducing this star-dazzling shaker layout!!  That is correct - the shaker is built right into the layout to add that extra magical touch!  

Click on the photo and it will open in a larger window for better viewing of the layout details -- because after all, Disney is all about the magical details right?


My favorite part of the layout is the Mickey head shaker filled with Silver Star Confetti!  While hard to see in the photo, the polka dot rim has a stitched design and the outline of the head and ears are embellished with Diamond Black Stickles!


Part of the title is welded to the overlay itself, however the title could easily be altered by trimming the "a" off and removing the word "place".  I love how easily it is to adapt!


The white circles are photo placement holders.  They are included in the kit to trace and cut pictures to size.  All of the patterned circles, and circle segments, are included in the kit for creating ease.

Additional details include this Silver Star Confetti strip that is on the left page!  So fun to create!  There is a strip of red line tape on a strip of black cardstock.  The film is removed and then the tape is completely covered with Silver Star Confetti.  Such a magical detail!


This layout project is one of my Create and Takes for the Stamp & Scrapbook Expo Red, White and Blue Virtual Event this weekend!  The C&T is just $10 and comes ready to put together.  A You-Tube video will be shared here soon that takes you step by step through the creating process.  The kit may be purchased by clicking here.

Supplies used:  (CC7201) Happiest Place Paper, (Z2900) Silver Star Sequins, (1385) White Daisy cs, (X5978) Glacier cs, (X6047) Black cs, (Z4310) Circle Shaker Acetate Window & Foam, (Z4309) Circle Shaker Window Thin Cut, (retired) Sweet Safari Paper Pack, (Z3314) Black & White Dots, (Z2060) Thin Foam Tape, (Z3372) Adhesive Runner, (Z4220) Anti-static Pouch, (Z3561) Black Diamond Stickles.  These can be ordered at: www.tonyasheridan.ctmh.com.

Sassfully yours,
Tonya

Friday, January 15, 2021

SJLS #9 Seriously, I (heart) you...from bow to toe!

 Sassy January Layout Series #9

My apologies for the delay as I had some major techy issues this week and did not have access to my computer, but I will catch back up in the coming days!  With that being said, welcome to the 9th segment in a series of 31 that will be shared during the month of January. Click here to find out more about the Sassy January Layout Series.

This layout is so much fun!!  Whimsy, combined with a little flirty, and seasonally timed so that it could be used for Valentine pictures should you choose!!  My personal version, which I will add early next week, when my photos arrive, showcases pictures of my daughter, and I, with our girlfriend Minnie Mouse!  Which is why I have added the sub-title "from bow to toe".  You of course can delete that part of the title should your pictures not be Minnie Mouse themed!  (lol!).


This layout was created by pairing our current special Perfect Match with several patterns from previous Mix-In paper collections and several of our stitched and non-stitched thin cuts for a hand made embellishing touch.  The Perfect Match paper collection blends the Ballerina, Flamingo and Candy Apple with Black and White creating a perfect blend that would work for many scrapbook themes.

Multiple sets of Thin Cuts were used to custom cut the hearts, arrows and tags and then they were layered with foam tapes.  I especially love the title "seriously, I (heart) you" that was Cricut cut.

Here, you can see how the Stitched Shaker Heart and Circle were used and paired with the Stitched Heart Thin Cuts and the arrows.  The detail of the stitching just pops right?


Although it might be a little challenging to see in the photo, the large stitched hearts are popped up with the foam heart rims from the Heart Shaker Foam and Acetate which makes popping them up so easy!


The stitching even pops with patterned paper!


The Fancy Tag thin cuts were used to create this fun combination!


For the photo mats, the striped watercolor print paper was used.  The kit also includes a piece of Candy Apple cs for those who would like to incorporate more of the red tones in their layout.


The sub-title which was cut for my personal layout just makes my heart giggle!  A bi-line of Minnie, I couldn't help but add it!  Although my title is included in the kit, you can also request a custom bi-line for your own layout.  Simply list it in the note section at check-out.  This is cut with a base of Black cs and then a slightly smaller top layer of letters cut out of Ballerina.  The words I wanted to emphasize I used both layers so the "bow" and "toe" would stand out.  Note how fun the words look, and stand out, on the lined patterned paper.


Supplies used:  (CC12201) Perfect Match Paper Pack, (X6047) Black cs, (X6036) Ballerina cs, (X6050) Flamingo cs, (Z3870) Heart Shaker Thin Cuts, (Z4182) Stitched Heart Thin Cuts, (Z4309) Circle Shaker Thin Cuts, (Z4312) Heart Window Foam and Acetate, (Z2060) Thin Foam Tape, (retired) Mix-In Papers.

---------------------------------------------------------------------

Today's partnering special features the Stitched Heart Thin Cuts.  These are very low in inventory, and have retired, so if you haven't added them yet to your collection this is the perfect time to do so!  For the special price of $9 you are being given quite the savings.  You might even want to consider getting a second set!  (I personally have three sets as we use the small stitched heart almost daily at my house!)   There is nothing additional for shipping or tax so it is a great savings to try out this fabulous product that you are most certainly going to fall in love with!  This special is available until 9:59am on 1-16-2021.


This product special, and layout kit, are available in my shop at: www.inallsassiness.com as a part of the Sassy January Layout Series.  For more details on this series, click here.

Sassfully Yours,

Tonya


Friday, January 8, 2021

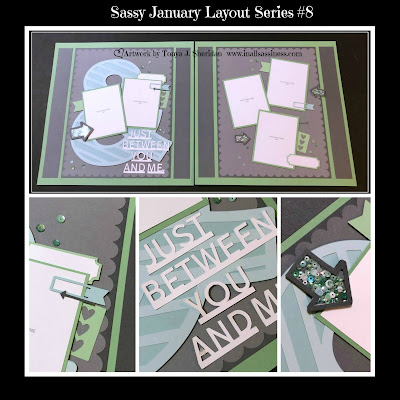
SJLS#8 Just Between You and Me Layout

Sassy January Layout Series #8

Welcome to the 8th segment in a series of 31 that will be shared during the month of January.              Click here to find out more about the Sassy January Layout Series.

Today's featured layout was created, and cut out on the Cricut with Close Heart's Everyday Moments.  I partnered the colors Charcoal, Pewter, Julep and Glacier.  I love the neutral feel of these colors together and how they compliment one another. 


My favorite part of this layout is the arrow "sort of shaker" elements!  These aren't really shakers as they don't shake but they certainly appear to be.  To create these, the base of the arrow was covered with red-line tape.  The tiny sequins from the Julep Loose Sequins were attached to the tape.  The outline of the arrow was adhered to a piece of acetate from the Square Foam Tape and Acetate Windows and then the acetate was cut to match the arrow.  Next, the narrow Thin Foam Tape (must be cut in 1/2) was adhered to the back of the arrow/acetate.  Finally the arrow outline with acetate was attached to the base securing the loose sequins inside.  This was done three times: one large and two small.

It's all about the details in this layout.  Note the brackets, scallops, arrows and photo clips.


Title Details:  The word "you" as well as "and me" are popped up with Thin Foam Tape.  The rest of the title is adhered flat.


---------------------------------------
Today's partnering special features the Acetate Windows and Foam Tape which are available in several shapes:  hearts, circles, stars, squares and rectangles.  You can purchase three of any set for $12.  List your selections in the comment section at checkout.   There is nothing additional for shipping or tax so it is a great savings to try out this fabulous product that you are most certainly going to fall in love with!  This special is available until 9:59am on 1-10-2021.


This special, and layout kit, as well as the bonus offering of the Shaker Acetate Windows and Foam Tape are available in my shop at: www.inallsassiness.com as a part of the Sassy January Layout Series.  For more details on this series, click here.

Sassyfully Yours,

Tonya

Friday, October 16, 2020

Pumpkin Glitter Shaker Tag/cards


Are you in love with pumpkins like I am?  Not so much the pumpkin spice for me, but I do love pumpkins!  There is just something about them that my make my heart go flippity-flop!

This pumpkin was created with Close To My Heart's new Bloom & Grace Cricut collection.  In Design Space, I altered the size of the pumpkin to encompass the 3" circle from our Circle Shaker dies before cutting the pumpkin's pieces.  From there, all of the pieces were cut out and adhered together to create this cute shaker tag.  My original plan was to use this shaker tag on a bottle wine, or a plate of cookies, but you could also convert it into a traditional card or place card.  So many possibilities to choose from when creating your own art!
Here is a step-by-step video walking you how to make these sparkly cute shaker tags/cards!  https://youtu.be/nHrc858LI5E

These shaker cards are available as a pre-cut kit in my In All Sassiness shop at: www.inallsassiness.com.  Click on the second box for my In All Sassiness Designs Shop.  Or, you can purchase the Cricut collection and supplies and create you own.

The Bloom & Grace Cricut collection can be purchased through my Cricut Affiliate link by clicking here.


Once you have this collection, you will then be able to cut the file.  Click here for the file.

Supplies used in this project are:  (Z2829) Espresso Exclusive Ink Pad, (Z3293) Clear Shimmer Brush, (Z4310) Circle Shaker Window Foam & Acetate, (Z4309) Shaker Window & Confetti Thin Cuts, (X5951) Espresso cs, (X6045) Sage cs, (X6055) Desert Rose cs, (Z3842) Desert Rose Glitter Paper, (Z4065) Rose Gold Sequins, (Z3372) Adhesive Runner, (Z341) Mini Glue Dots, Bloom & Grace Digital Cricut Collection.  These supplies may be purchased at: www.tonyasheridan.ctmh.com.

Have a great day and make it sassy!

Saturday, September 12, 2020

Gingerbread Flip Flap Book


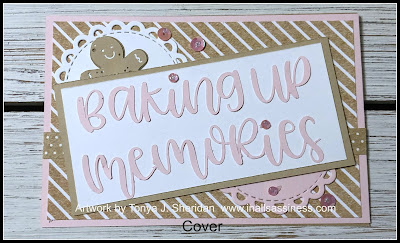
Such a fun way to create a mini-album -- with our signature Flip Flaps!  This book concept was designed by fellow consultant Jen Patrick and I adore it!! I have made several variations, but this Gingerbread one is my all time favorite!!  I love how the French Vanilla looks like the royal icing on the little gingerbread men!  


Click here for a video teaching you how to create this cute little book!!

You can purchase the kit to create this book, or others like it, in my In All Sassiness Designs shop at: www.inallsassiness.com.

Supplies used:  Supplies used: (Z3293) Clear Shimmer Brush, (Z3231) 4” x 6” Flip Flaps, (Z3639) Scalloped Circle Thin Cut, (X6044) Peach cs, (X5950) Toffee cs, (Z2828) Toffee Exclusive Ink Pad, (Z2805) Black Ink Pad, (Z6045) Rose Gold Loose Sequins, (Z4023) Thin Cuts - Square Multi Windows, (D1884)) From Candyland Stamp Set, (Z2068) White Fine Embossing Powder, (Z891) VersaMark, (Z3662) Toffee Shimmer Brush, (Z3661) Peach Shimmer Brush, (X6046) French Vanilla cs, (1385) White Daisy cs, (Z2060) Thin 3-d Foam tape, (Z3341) Thin 3-d Foam Dots, ((Z3372) Adhesive Runner, (Z341) Mini Glue Dots, (Z3340) Dual Tip Permanent Glue Pen.   All of the current items may be purchased on my Close To My Heart website at: www.tonyasheridan.ctmh.com.

Sunday, July 26, 2020

Shaker Element Banners

So, I have a confession to make. I am passionately obsessed about our shaker elements!  And not just a little obsessed...we are talking majorly obsessed!  I love to think out-of-the-box and see what I can do with them.  Of course, they are designed for our cards, but have found that I love incorporate them in my scrapbooking layouts, and most recently, I have used them to create both ornaments and banners.

When Close To My Heart first introduced the Summer Vibes collection, the little pink flamingo found in the Acrylic Shapes took my heart! I knew right away that I wanted to use this for home decor in my daughter's room.  She claims that flamingos are her spirit animal and she loves anything pink!  So I played with several ideas and came up the idea of using the shaker elements to create a banner and that I have started, I just cannot stop creating them!  

This is the banner that I created for Abby's room!  It uses our new color that is appropriately called "Flamingo", the Acrylic Shapes, and our Silver Foil paper.  To incorporate the elements that I wanted to use (I wanted three of that cute flower for placement), I used three sets of the Acrylic shapes but you could certainly alter to so that you could use just one set.


Here is a banner that I created to hang on our Christmas tree - but it could easily be used on an interior door or as a wall hanging.  This one was created with a retired paper collection and it is available to purchase in my In All Sassiness Designs shop while supplies last.


Supplies used:  (Z4310) Shaker Window Foam and Acetate, (Z3366) Silver Foil Paper, (retired) Beary Christmas paper, (Z4304) Silver Loose Sequins, (Z341) Mini-Glue Dots, (Z679) Liquid Glass, (X7258C) Summer Vibes Coordinating Cardstock (Flamingo), (X7258E) Summer Vibes Acrylix Shapes, (Z4182) Thin Cuts - Stitched Hearts, (Z4309) Thin Cuts - Shaker Window and Confetti, (Z3563) Diamond Stickles and Ribbon.  Current Close To My Heart products may be purchased at: www.tonyasheridan.ctmh.com.

Note:  There will be a video posted soon with a step-by-step on how to create the shaker element banners.

Create sassily!
Tonya