Showing posts with label Tutorial. Show all posts

Friday, October 22, 2021

Shimmer Trim Overlay Layout

Darlings, you most certainly are marvelous!!  Love this layout!! The color combination used, the overlay, the details, and of course, the "darlings" that the layout was created for!

Truth.  I re-created, tweaked, and altered a card design that I used many moons ago (we are talking maybe 2013 when Artbooking was first introduced!) and made it into a layout design that I am now even more in love with than the initial card!

The overlay design was significantly altered, sliced, and welded in Design Space to create the look that I wanted and so that the design would stretch the length of a 12" page so you are actually seeing 4 different sections 4" x 12" in size, all created on the base pages.

The Shimmer Trim that I used in the Darlings layout is Flamingo and Papaya however, this could be tweaked to your choice of colors -- or even to highlight more than two colors - this is just the combination I really like for my photographs.  If going with my sequence, the layout will require 4 rolls of shimmer trim with a little left on each roll.


The words "Darlings" and "marvelous" are cut three times, stacked and adhered directly on top of one another for stability.  As the title is so incredibly intricate it was challenging to pop the title up with Thin Foam Tape, and stacking the layers of cardstock helped create that thickness and height so that there is more depth in the layout.  Because of the texture of the Shimmer Trim, it is important to adhere the title over the White Daisy overlay so that the title has something to adhere too.


Hand-journaling isn't typically my forte' however I decided to journal directly on the overlay itself.  Doing this didn't break the flow of the overlay yet become a complimenting component of the layout.


The Clear Shimmer Brush was used on the stamped macarons to pull in the glitter component.  These worked great for my personal layout, but could easily be switched to another embellishment for another layout.


Now that you have seen the possibilities for the layout, here is the card design that the layout originated from with updated colors.  This is indeed a 5" x 7" card and perfect for a special occasion.


-----------------------------------------------

So let's take this step-by-step on how to create the overlay portion of this layout:

For this step-by-step, Candy Apple and Clover Green Shimmer Trims were used.

1.  Begin with the overlay.  Flip this to the back side where all the attachment, and positioning, will take place.

2.  Adhere Red-Line Tape to the edges and any of the spaces that will allow for it.  Also note, extending the red line tape to the All-Purpose mat helps keep the overlay in one spot and makes it easier to add the layers accurately.


3.  When attaching the Shimmer Trim, begin with the large scallop part of the overlay.  Attach the shimmer trim face down to the overlay allowing it to stick to the red line tape.  


4.  Using fine tip scissors, cut notches - essentially triangles - at each place where the scallop "dips". This is easiest accomplished by cutting from the front glitter side.  


5.  Remove the film from the scalloped portion of the shimmer trim.  


6.  Now, adhere the next layer of the shimmer trim making sure to attach it to the back of the scalloped shimmer trim.  This will keep the pieces from moving while you are filling in the spaces.


7.  Continue until all open spaces have been covered.


8.  Pull any remaining film from the back of the shimmer trim.  Adhere entire section to the White Daisy base.

9.  Using fine tip scissors, or a paper trimmer, trim all shimmer trim edges, that exceed the base, off.


10.  Repeat with all four sections.


11.  And you are done!  Easy right?

----------------------------------------------------------

Both the layout, and the card set, are available in my shop at www.inallsassiness.com.  When ordering my kits for either the layout, or the 5" x 7" cards, you have color choices!  I can't wait to see what color combinations that you will put together!  


Supplies used: (Z3515) Black journaling pen, (1385) White Daisy (Z3801) Flamingo Shimmer Trim, (Z5014) Papaya Shimmer Trim, (X6047) Black cs, (Z3314) Black & White Dots, (Z2805) Black Exclusive Ink, (Z4101) Ooh, La, La Macarons Stamp & Thin Cuts, (Z3777) Waterfall Thin Cuts (the title banner), (retired) Stitched Circle Thin Cuts, (Z3293) Clear Shimmer Brush, (D2063) Smile Big Stamp Set,  (Z2060) Thin 3-d Foam tape, (Z3341) Thin 3-d Foam Dots, ((Z3372) Adhesive Runner, (Z341) Mini Glue Dots, (Z5024) Red Line Tape, Z3340) Dual Tip Permanent Glue Pen. Markers/Shimmer brushes of choice to color the macarons.  All of the current items may be purchased on my Close To My Heart website at: www.tonyasheridan.ctmh.com.

Sassfully yours,
Tonya

Friday, October 16, 2020

Pumpkin Glitter Shaker Tag/cards


Are you in love with pumpkins like I am?  Not so much the pumpkin spice for me, but I do love pumpkins!  There is just something about them that my make my heart go flippity-flop!

This pumpkin was created with Close To My Heart's new Bloom & Grace Cricut collection.  In Design Space, I altered the size of the pumpkin to encompass the 3" circle from our Circle Shaker dies before cutting the pumpkin's pieces.  From there, all of the pieces were cut out and adhered together to create this cute shaker tag.  My original plan was to use this shaker tag on a bottle wine, or a plate of cookies, but you could also convert it into a traditional card or place card.  So many possibilities to choose from when creating your own art!

Here is a step-by-step video walking you how to make these sparkly cute shaker tags/cards!  https://youtu.be/nHrc858LI5E

These shaker cards are available as a pre-cut kit in my In All Sassiness shop at: www.inallsassiness.com.  Click on the second box for my In All Sassiness Designs Shop.  Or, you can purchase the Cricut collection and supplies and create you own.

The Bloom & Grace Cricut collection can be purchased through my Cricut Affiliate link by clicking here.


Once you have this collection, you will then be able to cut the file.  Click here for the file.

Supplies used in this project are:  (Z2829) Espresso Exclusive Ink Pad, (Z3293) Clear Shimmer Brush, (Z4310) Circle Shaker Window Foam & Acetate, (Z4309) Shaker Window & Confetti Thin Cuts, (X5951) Espresso cs, (X6045) Sage cs, (X6055) Desert Rose cs, (Z3842) Desert Rose Glitter Paper, (Z4065) Rose Gold Sequins, (Z3372) Adhesive Runner, (Z341) Mini Glue Dots, Bloom & Grace Digital Cricut Collection.  These supplies may be purchased at: www.tonyasheridan.ctmh.com.

Have a great day and make it sassy!

Wednesday, February 12, 2014

Creating Valentine's with Studio J

Sounds like an odd thing to do, doesn't it?  The capability has been there before, but the task would have been incredibly time consuming. Now, with the new Studio J enhancements that were put into place on February 1st, creating Valentine's has become so much easier!  Not a lovey-dovy type person?  You could adapt this same idea for place cards, lunch box cards, and so many other possibilities!

What makes the Valentine's possible is the addition of the Express Collection: Photo Collections.  So tonight I am going to walk you step by step through the process of using this new Photo Collection element to create your own Valentines.

So let's get started.
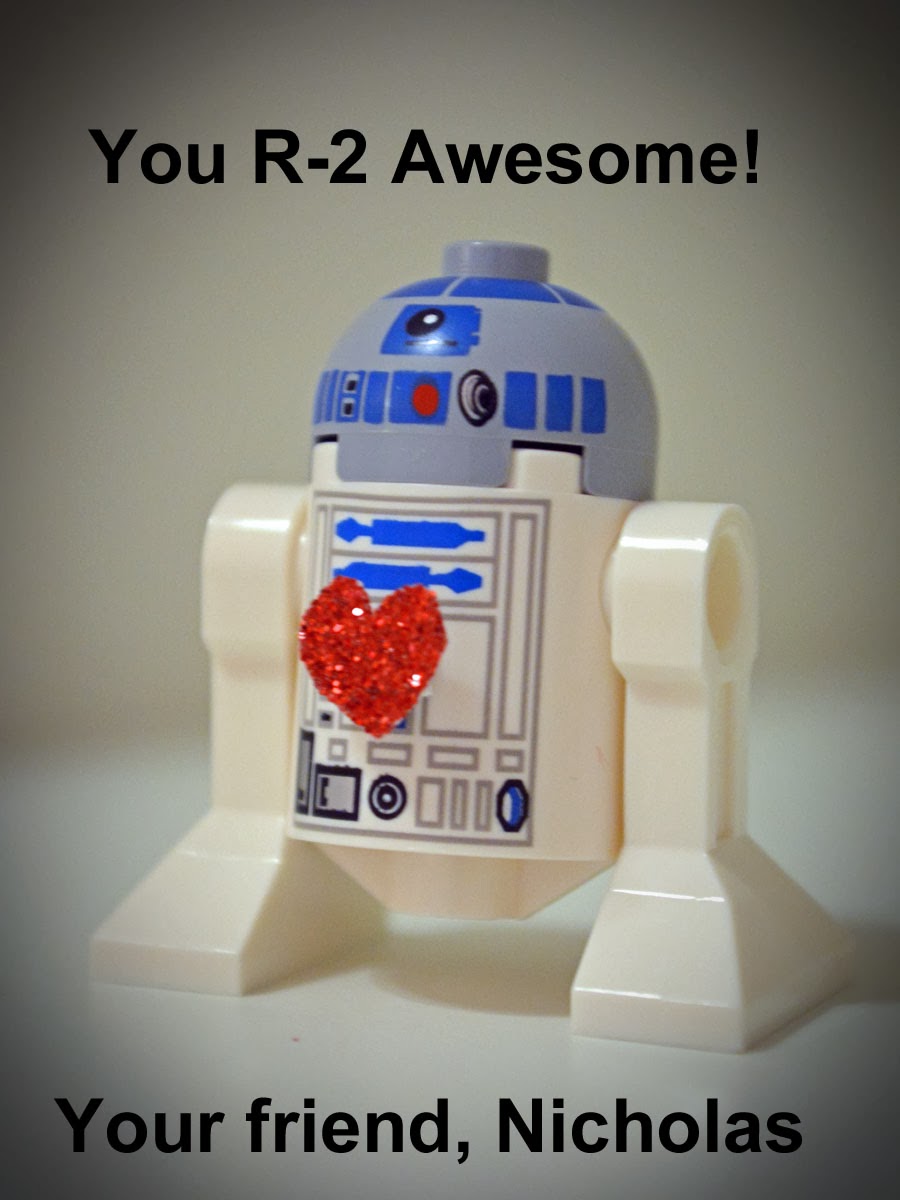
Here are the Valentine's that my son Nicholas and I created.  He posed his characters and helped decide on what he wanted the verses to say.  I then photographed them and took the photos to Adobe Photoshop where I sized them at 3" x 4" (which is important as you want the Valentine to fit into the photo well perfectly and not crop edges out), added some basic photo editing,  text and vignettes and then saved the photographs.  So from this point, I will refer to these as my Pre-Created Valentines.


This is what the Valentine's will look like when they arrive from CTMH. To see a larger view, click on the image and it will open in a larger window.  


PRE-CREATED.
The first type that I will teach you is assuming that the image, altered picture, or "Valentine" has already been created in another program such as Adobe Photoshop Elements.  I used Adobe Photoshop Elements 11 for my Star Wars Lego Valentines.

First, log-in to Studio J.  If you don't already have an account, start here.

Click on "Create New Project".

Choose and type in a project name.  Click "Create Project".

The upload photo screen will appear. If you have photos ready to upload, you can do so, if not click "Upload Photos later".

Click "Start with an Express Collection". (note to see any of the screenshots larger, click on the image and the  picture will open in a larger window)

Click on to highlight "Photo Collections".  Then click "Continue."

Next select a layout design from the Express Collection that fits your needs.  For the classic Valentine size, click to highlight "3" x 4".  Click "Continue".

Load your pictures using the load button on the left side of your screen.  Once this is done, this is what your screen will look like.

Next, you will load the pictures into the photo wells.  You will note that one "sheet" of the wells are horizontal and one "sheet" are vertical.  If you need some of the horizontal wells to be vertical, you will need to change the orientation of the pictures in the photo area.

Before Rotation:

 After Rotation: (see how the first R2-D2 and the Rebel guy are rotated?)

To add the photos into the photo wells, click the photo and drag it into the desired position until all are filled.

Next, to create additional pages, click "Add Layout" or to purchase the project, click "Buy Project".  Then all you have to do is wait happily with your personal paper trimmer until Mr. or Mrs. Fed EX deliver the Valentines to your door.  

CREATE ENTIRELY IN STUDIO J
The second type I am going to show you in a little more time consuming but still rewarding.  This type would be used if you haven't pre-done the Valentine in a program such as Adobe.

Here are the cards that my son Gabriel and I created.  As most of my followers know, he is passionate about Polar Bears, and truly that is an understatement. We were not able to find Valentine's with Polar Bears on them (I know, go figure right?)...so I decided to get creative.  We found a stock photo at Fololia.com and that is where we started.  We decided that the photo would look best as a square concluded on 4" x 4" as our finished card size.


To create:
First, log-in to Studio J.  If you don't already have an account, start here.

Click on "Create New Project".

Choose and type in a project name.  Click "Create Project".

The upload photo screen will appear. If you have photos ready to upload, you can do so, if not click "Upload Photos later".

Click "Start with an Express Collection". (note to see any of the screenshots larger, click on the image and the  picture will open in a larger window)

Click on to highlight "Photo Collections".  Then click "Continue."

Next select a layout design from the Express Collection that fits your needs.  This time, we will be using the 4" x 4" layout.  Click "Continue".  

This is what your screen will now look like.

Next, drop the photo from the photo box into the first upper photo well.  Use the pop up box to edit the photo as desired.  For my photo, I changed the size to 130 in size.   

For further editing, such as adding text, I highly recommend using the zoom tool.  This helps with the detail work significantly.  To give you an idea of the edits I made: I added a journaling box, changed the font to Shoebox, set at size 22 and then turned the vellum off.


Next, I added a second text box with a few edits: again, changed the font to Shoebox, the size to 16, angled the box and then turned the vellum off.

Here is a screen shot of the finished card.  

Now, you would repeat the process for each of the remaining 17 cells.  At this point, at least not to my knowledge, the program does not have the capability to repeat the entire cell into another cell.  You can copy and past the initial image but not the cell.  Once you have completed all of the cells, your cell should look like this.


Next, to create additional pages, click "Add Layout" or to purchase the project, click "Buy Project".  Then all you have to do is wait happily with your personal paper trimmer until Mr. or Mrs. Fed EX deliver the Valentines to your door.  

And there you have it.  If you try to make your own and become "stuck" along the way, send me an e-mail at: inallsassiness@gmail.com and I will try my best to help you!  A disclaimer though...once you try Studio J...it becomes addicting!

Happy Scrappin'

Tuesday, November 26, 2013

Rosette Tree Tutorial


The most talked about and intriquing item in Close To My Heart's Holiday Gift Guide has been those beautiful tiered rosette Christmas trees.  That being said, I have had many requests, so I have put together a step by step tutorial on creating these beauties!  There are several ways to cut the strips.  I have chosen to cut all of my strips via Cricut Craft room with the help of some awesome friends, Barb and Theresa!   The steps are so much easier and everything is sized ready to fold.  But if you don't use Craft Room, you can cut the strips without it and add a few strips. 

For non-Cricut Craft Room:
To do this:  Use the rosette patten on page 50 of the Artiste Cartridge.
The strips are cut at 2 1/2" x 11 3/4".  You will need 13 sets of 2 and you determine the patterns.
Accordian fold as I illustrate below.
Next, the tricky part.  
The bottom layer will stay at 2 1/2".
Using your trimmer, cut 1/8" off the flat edge of the the strip.  You have to cut it off after it is folded or you might cut off the "tic" marks that help you fold it.  As you proceed up the tree, you will accumilitivley add 1/8" to the amount that you cut off each layer. 
So the bottom layer is 2 1/2".
the 12th layer layer has 1/8" cut off. (from the bottom)
the 11th layer has 2/8" cut off.
the 10th layer has 3/8" cut off.
and you will continue this patten all the way to the top.

Creating the Rosettes:  After all rosette strips have been Cricut cut, sort by pattern and size.  Select two strips that are the same. Accordion fold, and score if desired, each of the two strips using the tiny "tic" marks that are between the scallops.  Fold the entire strips.  The Background and Texture paper is a little easier to fold than cardstock.  One might find using a bone folder with the cardstock rosettes of advantage.   


Position the two matching strips side by side.  Using either Liquid Glass, or a Hot Glue Gun, adhere the two ends together.  If using the Hot Glue gun, be careful of the glue seeping through the diamonds and burning your fingers.


See below how the two pieces seam together to become one.


Next, connect the remaining two open ends, again end to end, of the now combined strips so that the strips are one connected circle.


On a flat surface, scrunch the rosette together pulling towards the center. 


Once scunched together, pinch in all pieces to create a round image.


Secure the rosette into position by adhering a pre-cut circle to the top of the rosette.  Hold for a few seconds/minutes to dry pending on whether Liquid Glass is being used or Hot Glue is being used.  Once dry, flip the rosette over and adhere a second circle for added stability.  That being said, I found a tip that made the entire process easier for myself was to use a larger circle on the underside of the rosette and a smaller circle on the upper side of the rosette.  This made it easier for me to remember which side of the pattern was meant to be face up when stacking and assembling the tree.


For the 13 layer tree, the finished rosettes (multi-colored) will look like this.  As all are double sided, they can of course be flipped as desired.


Assembly:  To assemble the tree, begin with the largest rosette.  Apply Hot Glue/Liquid Glass to the disk. Also add at least one "ring" of glue about 1" out from the circle so that it catches the folded edges of the rosettes.  Center, and stack, the next largest rosette on top of this first layer.  This step might be easier to do standing up so that you can look down to see if the layers are centered. Continue upward until all layers have been added to the tree.


To embellish, add snowflakes as desire.  These are attached with Hot Glue.  Add just a few dabs to the back of the snowflakes and then press the snowflake into the tree as desired.  Hold for a few seconds.  Embellish top of tree as desired.

Once snowflakes are attached to the tree, attach the tree to votive holder.  To do so, add a layer of Liquid Glass to the rim of the votive holder.  Gently center and position the tree on top of the holder.  Leave to dry for a few hours.  


Finished tree.

If you have any questions, feel free to e-mail me at: inallsassiness@gmail.com.  Supplies used:

Kits will also be available for order/purchase.  If you need them to be shipped add $6 for Priority Shipping.


Christmas Tree Kit/Class