Showing posts with label Happiest Place. Show all posts

Tuesday, December 13, 2022

25 Layouts of Christmas - Layout 8: Priceless.

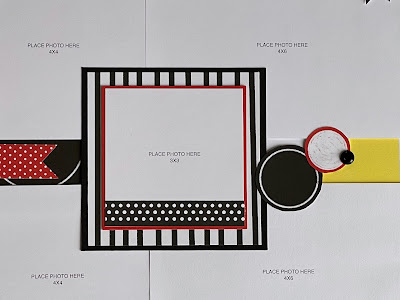
This layouts calls to the inner Disney heart in you!  Right??  Of course, if my head, it was designed for Disney themed photos, however it could certainly be used to document other life events and or moments as well.  I adore how well the various pattern papers work so well together!  The colors are classic together.

This layout will hold a wealth of photos - (4) 4" x 6" (2) 4" and (3) 3".  Additional photos could be added with Flip Flaps as desired.


Following the sketch-like "feel" of the layout, the individual circles are cut from the patterned paper.


multi-pattern detail


The Large Black Dot embellishments are a bold addition to the layout that blend in yet stand out!


pennant cluster detail


The title is Cricut Cut with the polka dot paper adhered to the back of the title.


Supplies used:  (CC7201) Happiest Place Paper Pack, (Z4634) Black & White Dots, (X6038) Candy Apple cs, (X6047) Black cs, (X7265S) Sweet Safari Paper Pack, (Z2060) Thin Foam Tape, (Z3372) Adhesive Runner.  The current supplies can be found on my Close To My Heart website at: www.tonyasheridan.ctmh.com.

This layout (available in limited quantities and while supplies last), and the accompanying product special for today can be found in my shop by clicking here.


The All-Purpose Mat is yours today for just $20! These are incredibly awesome! I position mine under my Versa Mats and use them for everything from adhesive to splattering.  They are easy to clean off and are just simply a "must-have".


Sassyfully yours,
Tonya


Tuesday, June 29, 2021

Best Trip Ever!

The Happiest Place paper collection is the perfect collection to document your "best trip ever"!

I created this layout with simplicity in mind so that my photos were truly showcased.  I thought the arrows were so much fun!  Some are popped up with Thin Foam Tape and some are flat, and to make it more fun they are going in different directions.


Here is the layout with my personal photographs and story:

Note: I took the pictures at an angle to try and avoid the glare from the page protectors.

Here is the layout with the flip flaps closed.


And here is the layout with the flip flaps open.  Note: I used two 4" x 6" vertical flip flaps.  They are purposefully on the left and right photos as it is somewhat challenging to have flip flaps directly beside one another.  Because of the seam of the flip flap they more or less "fight" with one another to lay flat.  I have found that leaving a space makes them work so much better.


For my journaling, I used the Cricut.  I love the way I have control over where, and how, it prints.


This layout is one of the create and takes that I designed for my summer expo season.  If may be purchased in my shop at: www.inallsassiness.com.  

Supplies used:  (Z6509) Candy Apple Exclusive Ink Pad, (Z2805) Black Exclusive Ink Pad, (Z3231) 4” x 6” Flip Flaps, (CC7201) Happiest Place Paper Collection, (Z3314) Black & White Dots, (X6047) Black cs, (X6038) Candy Apple cs, (1385) White Daisy cs, (Z2060) Thin 3-d Foam tape, (Z341) Thin 3-d Foam Dots, ((Z3372) Adhesive Runner, (Z341) Mini Glue Dots, (Z3340) Dual Tip Permanent Glue Pen. All of the current items may be purchased on my Close To My Heart website at: www.tonyasheridan.ctmh.com.

Sassfully yours,
Tonya

Friday, June 25, 2021

Mickey Shaker Layout

 Introducing this star-dazzling shaker layout!!  That is correct - the shaker is built right into the layout to add that extra magical touch!  

Click on the photo and it will open in a larger window for better viewing of the layout details -- because after all, Disney is all about the magical details right?


My favorite part of the layout is the Mickey head shaker filled with Silver Star Confetti!  While hard to see in the photo, the polka dot rim has a stitched design and the outline of the head and ears are embellished with Diamond Black Stickles!


Part of the title is welded to the overlay itself, however the title could easily be altered by trimming the "a" off and removing the word "place".  I love how easily it is to adapt!


The white circles are photo placement holders.  They are included in the kit to trace and cut pictures to size.  All of the patterned circles, and circle segments, are included in the kit for creating ease.

Additional details include this Silver Star Confetti strip that is on the left page!  So fun to create!  There is a strip of red line tape on a strip of black cardstock.  The film is removed and then the tape is completely covered with Silver Star Confetti.  Such a magical detail!


This layout project is one of my Create and Takes for the Stamp & Scrapbook Expo Red, White and Blue Virtual Event this weekend!  The C&T is just $10 and comes ready to put together.  A You-Tube video will be shared here soon that takes you step by step through the creating process.  The kit may be purchased by clicking here.

Supplies used:  (CC7201) Happiest Place Paper, (Z2900) Silver Star Sequins, (1385) White Daisy cs, (X5978) Glacier cs, (X6047) Black cs, (Z4310) Circle Shaker Acetate Window & Foam, (Z4309) Circle Shaker Window Thin Cut, (retired) Sweet Safari Paper Pack, (Z3314) Black & White Dots, (Z2060) Thin Foam Tape, (Z3372) Adhesive Runner, (Z4220) Anti-static Pouch, (Z3561) Black Diamond Stickles.  These can be ordered at: www.tonyasheridan.ctmh.com.

Sassfully yours,
Tonya

Thursday, June 17, 2021

June's Little Mice Cards and stamps

When you become one of my VIPS, or make a $75 purchase (before shipping and tax) collectively in my In All Sassiness Designs Shop or at www.tonyasheridan.ctmh.com, you will receive that month’s Little Mouse special as my gift of thanks to you.  The cards are pre-cut, pre-cut & include the embellishments, instructions and a color photo.  I will be teaching the set as a class that will be recorded and may be watched live or in play-back.  

Included in the kit, and on the post introducing each months special set, I will be sharing the non-consumable items that were used to create the cards as well in case you want to order them or you can certainly use the supplies that you have at home.  

For those who would like additional cards, or just want to order the card sets - they will be available for purchase without the exclusive stamp sets here in my shop: these come as a set of 4 - 2 each of two designs.

Note: a few sales exclusions do apply and I will post those when I share the special each month.  

So now that you know all of the details, here is my June Little Mice collection!

I created these both using the Happiest Place Collection.


Details of Little Fair Mouse card

Details of Little Summer Mouse Card

Additional Supplies needed to create the cards:  (Z4223) Red Shimmer Brush, (Z3671) Lemonade Shimmer Brush, (Z3293) Clear Shimmer Brush, (Z4224) Black Shimmer Brush,  (Z3561) Black Diamond Stickles, ((Z2475) Brown-Grey TriBlend Marker, (Z2483) Light Yellow TriBlend Marker, (Z2060) Thin Foam Tape, (Z3372) Adhesive Runner.

Other supplies used:   (CC7203) Happiest Place Cardstock, (1385) White Daisy cs, Z3366) Silver Foil Paper, (X254) Value Cards & Envelopes, () Black Exclusive Ink Pad, 


Sassfully yours,
Tonya


Wednesday, August 5, 2020

What a Ride! Layout

Introducing the Happiest Place collection with a fun, and interactive, Flip flap addition!  This layout was created to capture moments that were full of fun - whether it be at an amusement park, a carnival, street fair or even Disney!  I love the simplicity of the layout and how it highlights the photos.  


Although not seen in the picture here because of the camera glare, the flip flap is attached to the top of the page protector.  The flip flap is filled with Silver Star Confetti and then sealed with red-line double sided tape.  A strip of Black Shimmer Trim is adhered over the inside seal of the flip flap and then a second piece is adhered on the top of the flip flap overlapping where it shows through on the opposite side.  Trim the edges of the shimmer trim to fit the edges of the flip flap.  I love the magic that the confetti filled flip flap adds! Thanks to Close To My Heart for showing this technique to me!  


The ferris wheel is such a cute sticker!  So detailed!  This is popped up on Thin Foam Tape and a small Glacier star sticker is added to the center of the spokes. 

The other detail that I love is the stamped title ""#whee!".  This is stamped with our new stamp Magical Alphabet with Black Ink. I inked the stamps and then I daubed a sponge lightly over the stamps before stamping them onto White Daisy cs.  By doing this, it allowed the stamping to looked "chalky" like the confetti patterned paper is. It is then cut out, and adhered to the photo with Thin Foam Tape.  This is such a cute font - a must have for all stampers and scrapbookers and I am sure one that I will use over and over again!


Supplies used: (CC2701) Happiest Place Paper Pack & Stickers, (Z1809) Black Shimmer Trim, (D1937( Magical Alphabet Stamp Set, (Z3314) Black & White Dots, (Z2900) Silver Star Confetti, (Z3235) 4” x 4” Flip Flaps, (X6047) Black cs, () White Daisy cs, (Z2060) Thin 3-d Foam tape, (Z3341) Thin 3-d Foam Dots, ((Z3372) Adhesive Runner, (Z341) Mini Glue Dots, (Z3340) Dual Tip Permanent Glue Pen.   All of the current items may be purchased on my Close To My Heart website at: www.tonyasheridan.ctmh.com.

If you love this layout, the "What a Ride" Layout kit, can be purchased in my In All Sassiness Designs Shop by clicking here.

Sassfully yours, 
Tonya