Showing posts with label Cricut Flower Market. Show all posts

Wednesday, February 24, 2021

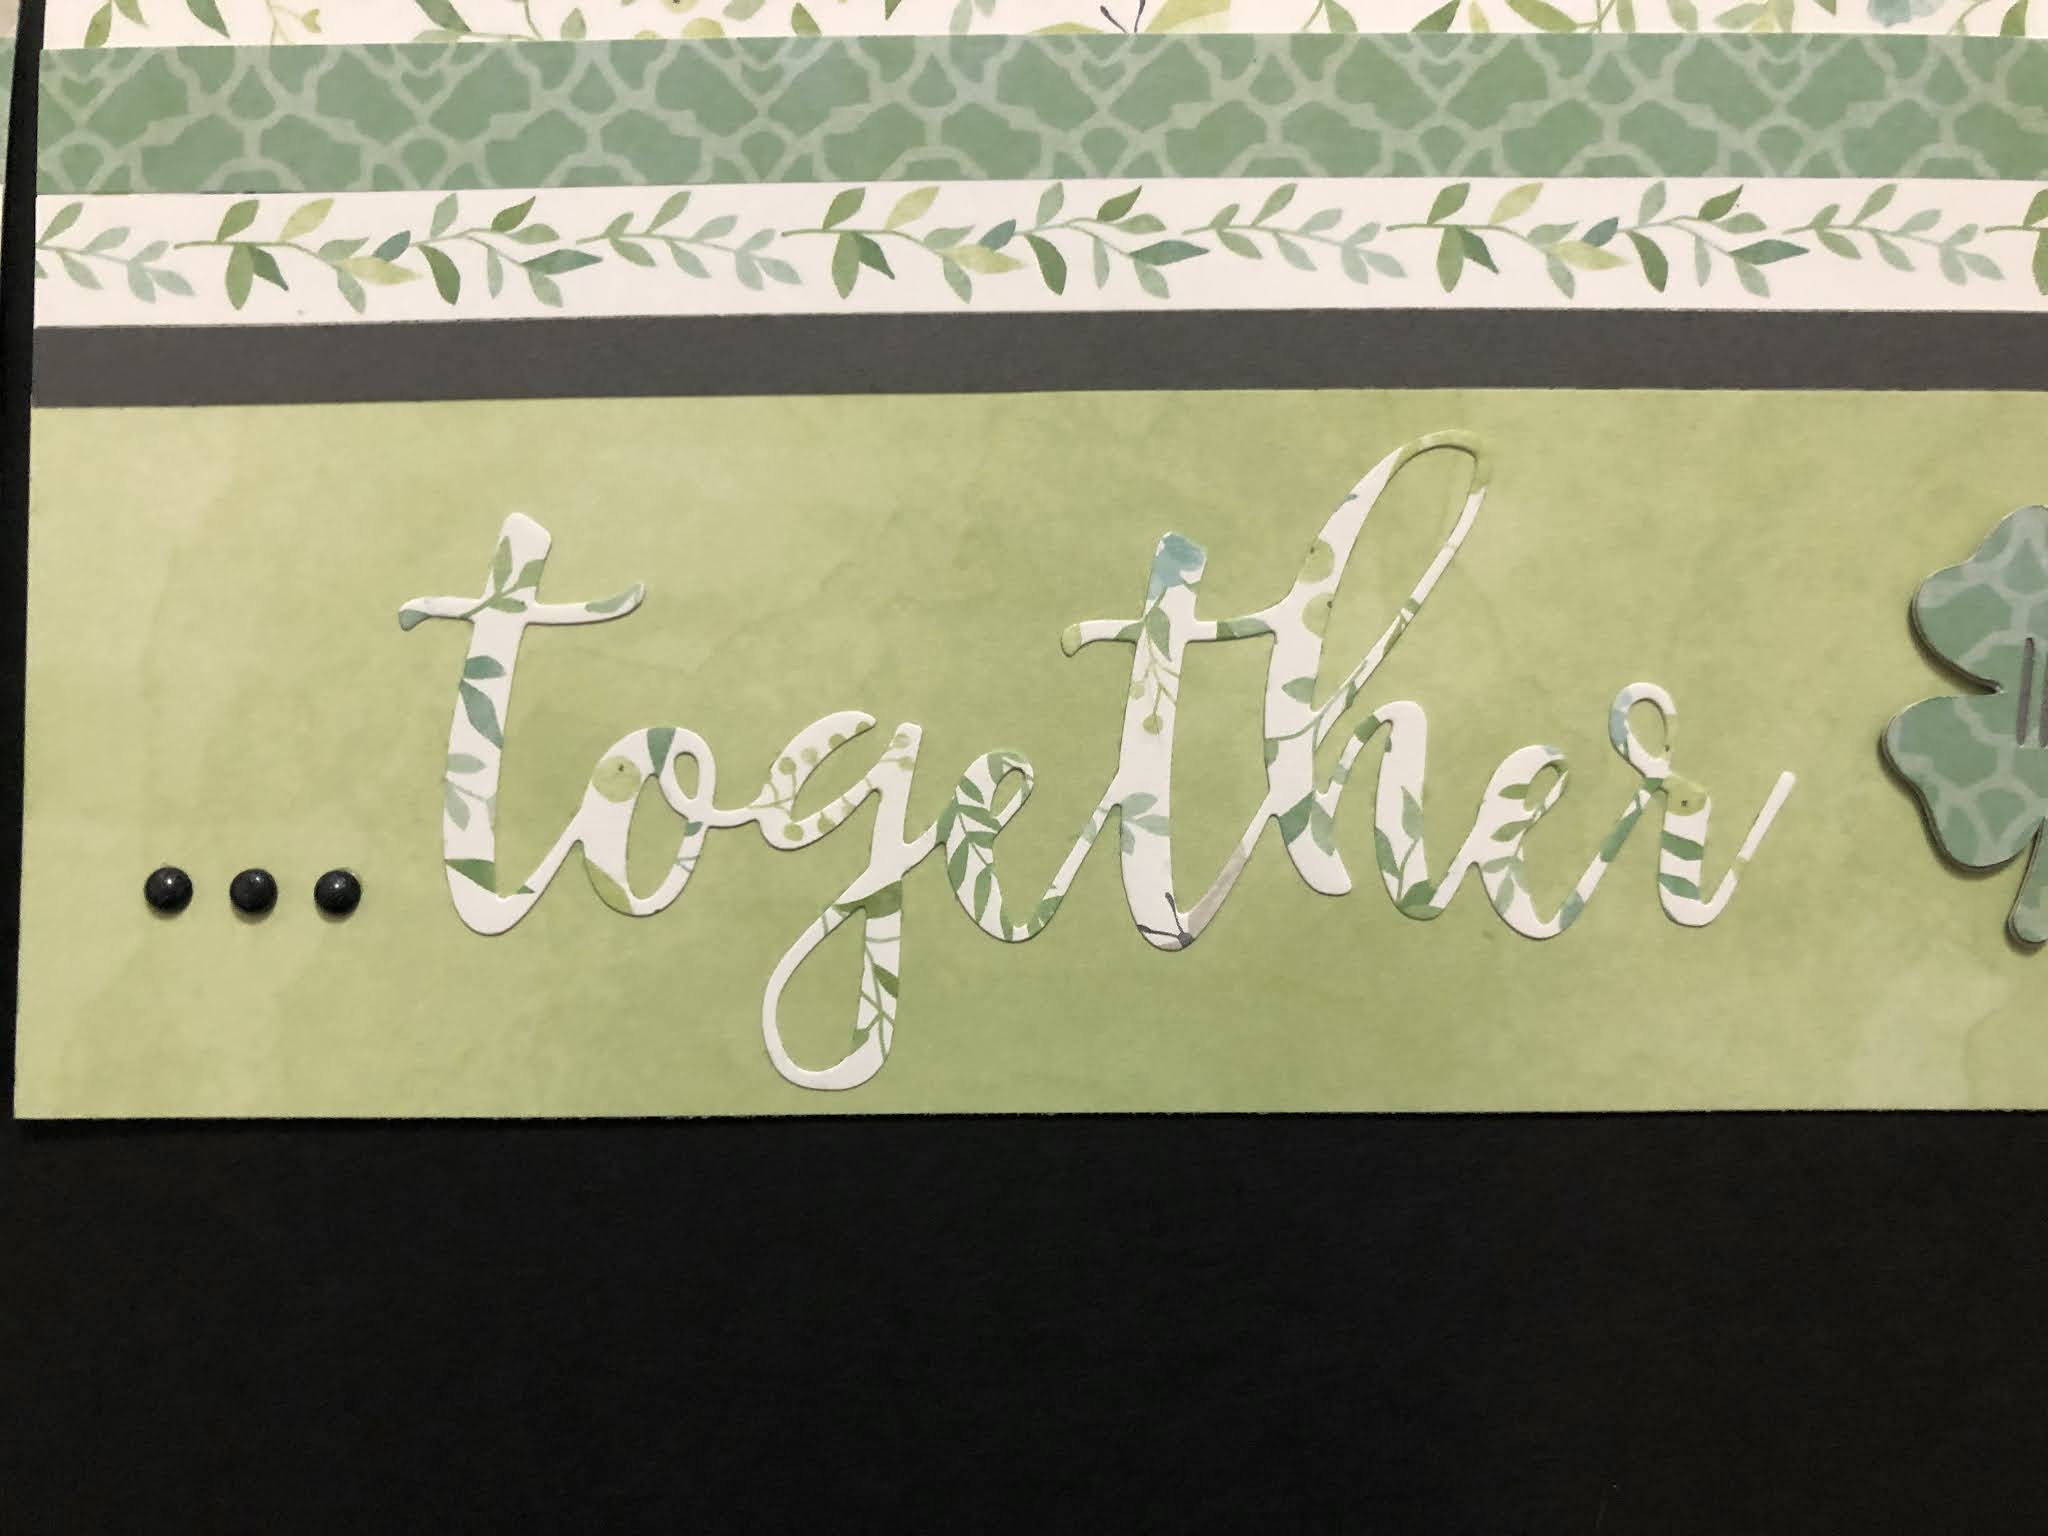
SJLS #28 Shamrocking Together Layout

 Sassy January Layout Series #28:  Shamrocking Together Flip Flap Layout

Welcome to the 28th segment in a series of 31 that will be shared during the month of January/early February.    Click here to find out about the Sassy January/February Layout Series.

This layout was quite a delight to create!  It features the Chelsea Gardens paper collection which had such a fresh spring feel to it!  One of the unique things that I love about this layout is how the titles, and shamrocks are cut from the patterned papers!  They really pop with the pattern close up!


The Shamrocking was cut out with the Cricut.  The font is from CTMH's Flower Market.


The title was cut with a now-retired Thin Cut set.  The detail is extraordinary.  The zip strip (with the vine) is one of several selections that is in the kit.  These might slightly vary.


The year/date was cut with Thin Cuts and can be custom cut in the year of choice.  Or, as a different option, the title could simply be "Shamrocking Together" and leave out the "in XXXX".


Supplies used:  (retired) Chelsea Gardens paper, Sweet Leaf cs, Scalloped Border Thin Cut, Together Thin Cut.  (X5953) Charcoal cs, (Z3234) 3" Flip Flaps.

Sunday, February 7, 2021

SJLS #21 U Are My Why Layout

Sassy January Layout Series #21:  U Are My Why

Welcome to the 21th segment in a series of 31 that will be shared during the month of January/early February.    Click here to find out about the Sassy January Layout Series.

This layout was created with our brand new In This Together Collection that is available for a short time.  The collection features beautiful, and quirky, artwork that is perfect for documenting our stay at home time/quarantine time from the last year and I will certainly being using that - but today I wanted to show how it could be used for other purposes as I like to see the many possibilities of our collections - both inside and outside of the box - to speak.


The bright and cheerful patterns blend so well together in this collection!  They remind so much of my daughter and by chance purple is her favorite color!

The "love this smile" image was cut from a Thin Cut Stamp from our Bring Back My Pack Blossom Collection.  This is  quickly becoming one of my faves.  


Fun Cricut cut daisies with the cute little dots just add to the charm!


The title was cut from the New Market Digital collection.  I love the flair of this font!


Supplies used:  (CC2211) In This Together Paper Collection, (CC2214) In This Together Dots, (1385) White Daisy cs, (X6054) Grape cs, (X5968) Lagoon cs, (Z2060) Thin Foam Tape, (Z3341) Thin Foam Dots, (CC122011) Cherished Blossoms Stamp and Thin Cuts.

Saturday, January 16, 2021

SJLS #10 Woodgrain Wreath Layout

  Sassy January Layout Series #9

Welcome to the 10th segment in a series of 31 that will be shared during the month of January. Click here to find out more about the Sassy January Layout Series.

This is a layout that I created in the fall for my Joys of the Season event.  It is almost entirely cut out of our Flower Market Cricut Collection.  


So, a few elements that I want to draw attention to.  First, is look at the raised red dots on the berries.  Aren't they beautiful? And don't they pop?!  Some of the berries have a small cut hole that enhances the look of the berry.  I added a dot of the Carnation Red Liquid Pearls to each of these cut outs and the other berries and it adds such a realistic appearance!  LOVE, LOVE, LOVE it!


Second, notice the glitter?? On the leaves and holly leaves?  This was done with the Shimmer Brushes and goodness - it looks fantastic - almost gives the appearance like frost does.  If you will also take note, the title "Silent Night" was also traced with the Espresso Shimmer Brush.  What a difference this makes.  Normally, I would most likely have used the Clear Shimmer Brush; however, for this one, I used the Avocado, Espresso and Evergreen Shimmer Brushes and all I can say it SHIMMER!!!  Can you tell that I am excited?


And third, I used the Espresso Shimmer Brush to draw a line across the bottom edge of the paper and create a border.  My hand isn't very steady but I went with that made it look realistic!  (lol!)


Supplies used: (Z3816) Avocado Shimmer Brush, (Z3812) Espresso Shimmer Brush, (Z3670) Evergreen Shimmer Brush,  (Z3799) Carnation Red Liquid Pearls, (X6038) Candy Apple cs, (X5959) New England Ivy cs, (X6053) Avocado cs, (X5951) Espresso cs, (X6030) Evergreen cs, (X8017) Woodgrain paper, (Z2060) Thin Foam Tape.

-------------------------------------------------------------------------


Today's partnering special features the Shimmer Brushes.  These are available in so many colors and will truly turn your creative world around!  For the special price of $15, you can choose 4 Shimmer Brushes in the colors of your choice.  This special in available until 9:59am on 1-18-2021.


This product special, and layout kit, are available in my shop at: www.inallsassiness.com as a part of the Sassy January Layout Series.  For more details on this series, click here.

Sassfully Yours,

Tonya

Wednesday, January 6, 2021

SJLS #6 Make A Wish Ornament Layout

 Sassy January Layout Series #6

Welcome to the 6th segment in a series of 31 that will be shared during the month of January.              Click here to find out more about the Sassy January Layout Series.

Today's featured layout is one that I designed and created a few months ago for a Weekend Long Scrapbooking celebration - with this post, it is now available while supplies last in my shop.  It is one of my favorites that I have ever created!  Featuring the Blue Belle (color of the year) and Sapphire Glitter Papers and the artistry of Close To My Heart's Cricut Cartridges, this layout is both artsy, elegant and classy (in my opinion!).

To see a larger view of the layout, simply click on the layout itself and it will open in a larger window.


The layout is designed around this pairing of geometric designs that are from Flower Market.  The images are not shown together on the digital collection, but nested perfectly together so I am sure CTMH must have created these with purpose.  Cutting one image in Blue Belle and one in Sapphire then pairing them together just added that elegance factor and I love it!


Details of the title and banner.  This is popped up with Thin Foam tape.


Each of the ornaments are popped up on Thin Foam Tape and extended from the Sapphire Crochet Thread.  There is a Blue Belle Loose Sequin at the top of each thread and it appears to hang from the sequin.  The sequin then has a dot of Clear Diamond Stickles in the center.


Here is my layout with my personal photos.

Supplies used:  (X6048) Blue Belle cs, (X5957) Sapphire cs, (Z3840) Sapphire Glitter Paper, (Z3442) Blue Belle Glitter Paper, (Z3676) Blue Belle Loose Sequins, (Z4058) Sapphire Crochet Thread, (1385) White Daisy cs, () Diamond Clear Stickles, (Z2060) Thin Foam Tape, (Z3440) Tombow Dual Tip Permanent Glue Pen, (Z3372) Adhesive Runner. 

---------------------------------


Today's partnering special features the Sapphire & Blue Belle Glitter paper.  When you purchase both sets you will receive a free pack of the Blue Belle Loose Sequins.  You can order the two as a bundle for $14.  That is a savings of over $5.95 plus the additional savings on the tax and shipping.  This special is available until 9:59 on 1-8-2021.

This special, and layout kit,  are available in my shop at: https://www.inallsassinessdesigns.com/ as a part of the Sassy January Layout Series.  For more information on the series, click here.

Tuesday, January 5, 2021

Serenity - I "heart" you Layout


Tonight I want to share a layout that I created with our Serenity paper (that I just can't get enough of), the Blue Belle glitter paper and our exclusive Cricut cuts.  I love the elegance of the Gerber Daisy - I think it is my favorite image on the Flower Market Cricut Collection as I keep going back to it time and time.  In my mind it is elegant, sassy and fun all at the same time.  

 The daisies were cut in varying sizes from the ombre' print in the Serenity paper collection.  The paper itself has gold flecks in it but I wanted to add more so I splattered each of the flowers with the Gold Shimmer Brush.  They are layered with Thin Foam Dots between some of the circles for depth.


I added Gold Foil Cricut cuts of the leaves and berry stems and backed them with the Blue Belle and Sapphire cs.  Each is tucked under the flowers and adhered with mini glue dots and Thin Foam Tape.  I love how these enhance the flowers and pop!


The I (heart) you is cut from our new Serenity Cricut Collection.  I think it is effortlessly beautiful.  This collection can be only purchased with a CTMH consultant's affiliate link.  I would love for you to use mine, and I receive a small commission from your order.  Here is my link.


This pre-cut kit may be purchased in my shop at: www.inallsassiness.com.

Supplies used: (X6048) Blue Belle cs, (X5957) Sapphire cs, (1385) White Daisy cs, (Z3365) Gold Foil Paper, (X7263S) Serenity Paper pack with Stickers, (Z3442) Blue Belle Glitter Paper, (Z3676) Blue Belle Loose Sequins, (Z3563) Diamond Clear Stickles, (Z3316) Gold Shimmer Brush, (Z3292) Clear Shimmer Brush, (X5957) Sapphire cs, (Z2060) Thin 3-d Foam tape, (Z3341) Thin 3-d Foam Dots, ((Z3372) Adhesive Runner, (Z341) Mini Glue Dots, (Z3340) Dual Tip Permanent Glue Pen.   All of the current items may be purchased on my Close To My Heart website at: www.tonyasheridan.ctmh.com.

To see more artwork with this combination of the Gerber Daisy and the ombre' Serenity paper, click on the links below:

Sassfully Yours,
Tonya


Friday, January 1, 2021

SJLS #1 This is the Way Layout


Sassy January Layout Series - #1

Welcome to the first of 31 layouts that will be shared during January!

This is the Way Layout - featuring the Black Ore and Pearl Papers!


This layout is so about the textures and blending them together!  The base is our White Pearl paper - so not a true white but richer in texture and feel with a matte finish.  The black throughout the layout is Black Ore which is a heavier weight paper with a shimmery metallic finish which of course makes it perfect (at least in my mind) for anything galactic!!


The little character is cut out of our Oasis Holographic paper.  We have had this paper a few years and I absolutely love it!  This shading however is my all time favorite of our offerings (even over the Twinkle Toes Pink which is adorable!).  Being holographic, it truly picks up, and pulls from the colors that it is surrounded by so in this case, the green tones are emphasized by the Julep in the patterned paper.  Absolutely love the pair together.  I am constantly amazed at how well the Holographic paper cuts both on the Cricut (for the Maker use the Holographic cardstock setting) and with Die Cutting machines.


Other details to take note of are the Julep Loose Sequins that are placed on the layout.  These again pull the holographic colors and add just that little touch of unexpected sass.

My little character and the fonts were purchased on Etsy as SVG's, then uploaded, resized, welded and re-envisioned and in Cricut Design Space.  There are so many options available to us as scrapbookers to create that perfect layout!  My family's Christmas was all about this little character and his counterpart  which made this layout such a joy to create and design.  The graphic for the pod was designed using images from Close To My Heart's Cricut collection in Design Space.  If you don't have this digital collection, it is certainly one of my faves!  You can add it to your collection using my affiliate link and I will receive a little % of the sale.  (so I thank you in advance).

For many who know me well, know that I love to take the time spent creating a layout, and use the same materials, ideas, and concepts to create cards and vice versa.  With that being said, once I created this layout, I immediately thought how awesome some of these elements would look on a card.  So, guess what?  I did just that and designed a card to go with the layout - tweaking the size, and a few of the elements.

I again used that Black Ore paper for the background of the card.  It truly screams galactic with the metallic shimmer.  This time, I chose to just use the Silver Foil and cut it with our new Diagonal Slimline Thin Cut.  I took the card one step further, and made it a shaker card by adding acetate, Thin Foam Tape and our Silver Star Confetti.  This created the perfect background!  Then I just added my sentiment, and my little character.  Because this was a smaller palette, and I wasn't using much green to pull the reflection of the Holographic paper, I used Julep cs for his head.  I love how the finished project turned out!


-----------------------------------------------------------

Today's partnering special features the Black Ore and Pearl Paper.  You may order a pack for $6.50 it either color or you can order a set of both for $12.  There is nothing additional for shipping or tax so it is a great savings to try out this fabulous product that you are most certainly going to fall in love with!  This special is available until 9:59am on 1-2-2021.


This special, and layout kit, as well as the bonus offering of the "Celebrate You Must" Shaker cards are available in my shop at: www.inallsassiness.com as a part of the Sassy January Layout Series.  For more details on this series, click here.

Supplies used:  (Z3879) Black Ore Paper, (Z3881) Pearl Paper, (Z3366) Silver Foil Paper, (Z3636) Oasis Holographic Paper, (X6029) Julep cs, (retired) Every Little Thing Paper, (X5950) Toffee cs, (Z3566) Julep Loose Sequins, (Z2060) Thin Foam Tape, (Z3908) Diagonal Stripe Slimline Thin Cut, (X257) Slimline Cards and Envelopes, (Z3440) Tombow Liquid Glue.

These items can be purchased at: www.tonyasheridan.ctmh.com.

Wednesday, November 11, 2020

Gerber Daisy Sliding Shaker Box

Today I wanted to share an elegant, interactive sliding box that I created using my Cricut and our new Serenity collection.  I previously created a fall variation of this box, and just adore it!  My vision is to use these as plate accents for Thanksgiving - and when the recipient opens the box they will find a little verse of why each member of our family is thankful for them and a few little treats!  But beyond that, they could be used for so many other gift giving possibilities!!


Note how sophisticated, and elegant, the stitched design transfers to the Gold Foil paper.
Beautiful and quite the finishing touch in my mind.


Love this box and want to create your own?  I invite you to watch a how-to instructional video that I have created taking you step by step through the process:  https://youtu.be/SMUTR99qEfk.  If you would like to create one just like mine, you can order the supplies in my CTMH shop, or I have pre-cut kits available in my In All Sassiness Designs Shop.


Supplies used:
(Z3840) Sapphire Glitter Paper, (Z3342) Blue Belle Glitter Paper, (Z3676) Blue Belle Loose Sequins, (Z3800) Blue Belle Shimmer Trim, (Z3365) Gold Foil Paper, (Z3316) Gold Shimmer Brush, (X7263B) Serenity Paper Pack, (X5957) Sapphire Cardstock, (X6048) Blue Belle Cardstock, (Z4314) Rectangle Window Foam & Acetate, (Z3440) Tombow Liquid Glue, (Z3563) Diamond Stickles.  Close To My Heart's Flower Market Cricut Collection (to add this to your digital collection, use my Cricut Affiliate link by clicking here).  Supplies may be purchased on my Close To My Heart site at: www.tonyasheridan.ctmh.com.

The Design Space File to create this box can be found here.  You will need Close To My Heart's Artiste' and Flower Market Cricut Collection for the file to cut.  If you do not have that file, you may purchase it using my CTMH Cricut Affiliate link.

Have a great day and make it sassy!


Friday, October 2, 2020

Gerber Daisy accented Pumpkin

Who doesn't love pumpkins during the fall??  If my family would allow them, I would be happy having pumpkins out all year long!  It is hard to put into words - there is just something about them that I just adore.  When I was in the hospital, I was not allowed to have any live "plants" in my room, and while I was okay without flowers, having to go through the fall season without pumpkins made my heart sad!  My favorites are the Cinderella style and the white pumpkins so when I found this beautiful white pumpkin, I couldn't wait to "accent" it with my favorite embellishments!

All that being said, I also adore Gerber Daisies and thought these two paired quite nicely together!  I used our Flower Market Cricut Collection to cut the Daisies and layered them alternating the sides of the cardstock - one with the darker side and then the next one with the lighter side.  Such a classic pairing in my mind!

I used the Clear Shimmer Brush, the Rose Gold Sequins and the Diamond Stickles to add glitter and sparkle and then cut and stamped a few tags for the finishing touch.

I invite you to watch this video to see how I created the pumpkin step-by-step:  https://youtu.be/0BbH1CpROIg


The Autumn Blessings Stamp set was used to create the tags.  This is available as a stand alone 
stamp set or as a Stamp Set/Thin Cut Combo.
Z3726 Tags & Tabs Thin Cuts:


Supplies for this project can be ordered on my Close To My Heart site at: www.tonyasheridan.ctmh.com.  

There is also a pre-cut, custom kit, that can be ordered in my shop at: www.inallsassiness.com.  The kit includes: a pack of Rose Gold Loose Sequins, the balance of sheets of Desert Rose, Espresso and Scarlet cs (about 1/2 sheet left of each after flowers were cut), 2 full sheets of Desert Rose Glitter Paper, 1/4 sheet of Desert Rose Glitter Paper (left after cutting the flowers out), pre-cut & pre-stamped tags and pumpkins and a piece of bulk ribbon to complete the project.

Make it Sassy!

Tonya